Tagged: tracage et decoupe
- This topic has 1 reply, 2 voices, and was last updated 1 year, 10 months ago by
Marie-Laure GILLET.
-
AuthorPosts
-
13 January 2020 at 17:09 #10207
EasySIGN
ParticipantSetting up your plotter
Open the Add plotter wizard File > Device Setup > ‘Add plotter’ Wizard…
1.) Select your plotter from the list (1) and click “Next”
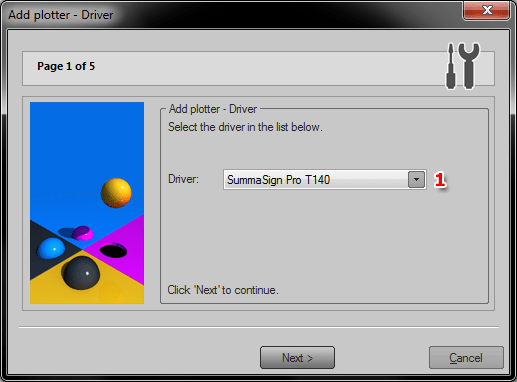
TIP: If your plotter is not listed, try the universal HPGL or DMPL driver.
2.) Select the port to which your plotter is connected (1) and click “Next”.
Note: In case the plotter is connected with a USB cable you will need to select the USB port as installed by the driver of the plotter manufacturer.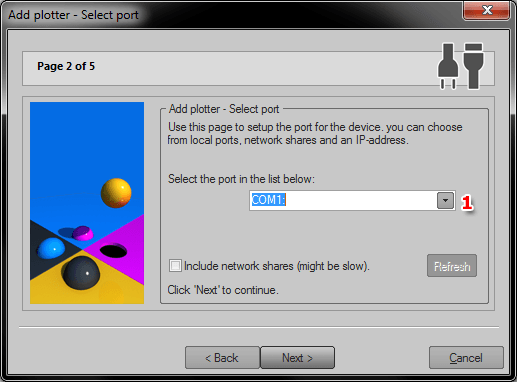
3.) Set the plotter communication details.
You can copy these settings from your plotter. After copying the settings click “Next”.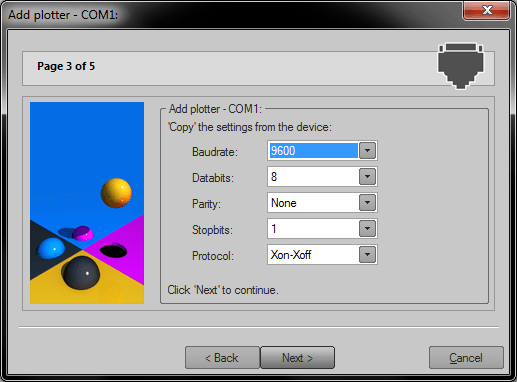
4.) Click on the “Finish” button to complete the installation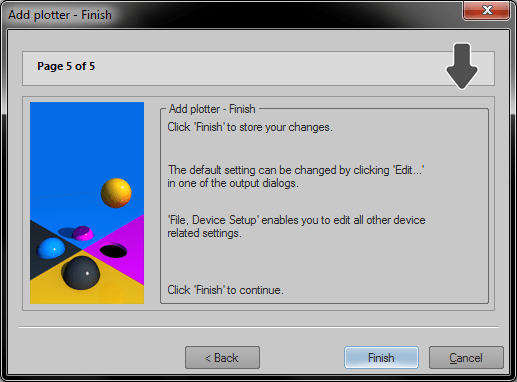
Adjusting plotter settings
Change your plotter settings File > Device Setup > Open…
Depending on the installed devices you will find a number of plotters here. Open the folder named “Plotters” and select the plotter.

On the right side you will see an icon named “Communication settings”. By double-clicking this icon you will open the Wizard in which you can change the port to which the plotter is connected.
On the left side click on the “+” sign in front of the name of the plotter and select the folder “Plotter settings”.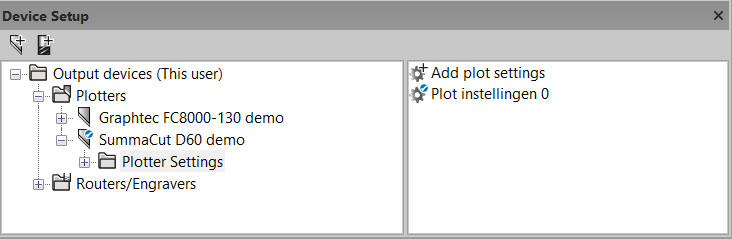
On the right side you will see an icon called “Add plotter settings”, double clicking this icon will add a new plotter setting. You can add as many different “Plotter Settings” as you need. A “Plotter Setting” contains all the available properties of a plotter so you can make a different setting for every type of job. Double click on the icon called “Plot settings 0”.
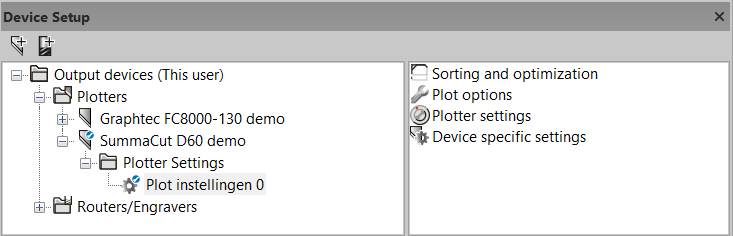
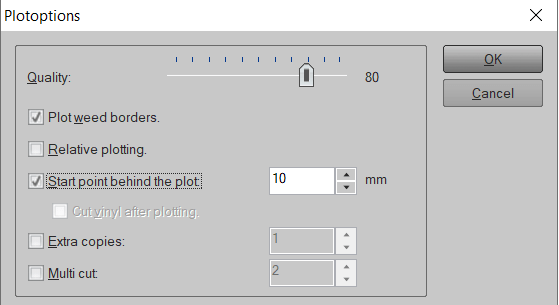
On the right side you will see different icons to control the different plotter settings. Double click for example on the icon “Plot options”, this will open a dialog to change the settings for e.g. “Start point behind the plot”.
Check the also the “sorting and optimization”, “Plotter settings” and “Device specific settings” menu’s for adjusting more settings.
Creating a plotfile
Open a new worksheet (File > New) and open the text editor as available in the toolbox on the left side on your worksheet.
Enter the text (e.g. EasySIGN) and scale this to the required size.
Add a weedborder (Insert > Production > Weedborder around selection) and make the following settings in the EasySIGN weedborder menu:
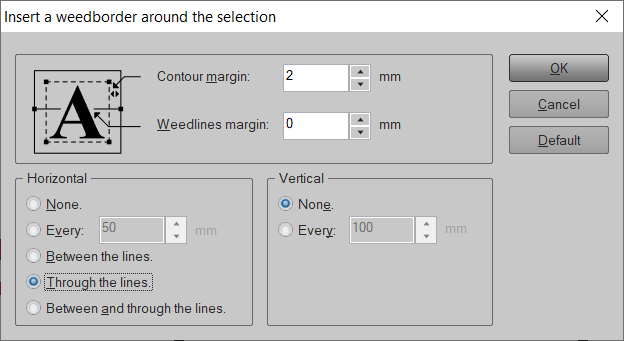
Adding a Weedborder will save you a lot of time peeling the vinyl. The line you see in the vertical middle of the Weedborder will add an extra cutting line (not cutting through the text).

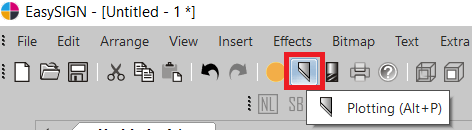
Now Select both the text and the weedborder (Ctrl+A) and press on the plot button (or menu: File > Plotting…)
The plotmenu will open, in which we choose the following settings:
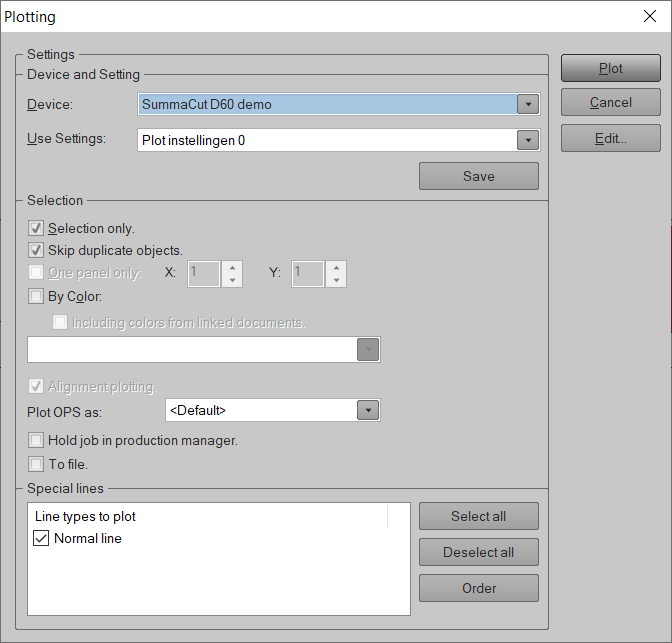
When you press “Plot” the file will be cutted on your plotter as follows;

-
This topic was modified 4 years, 3 months ago by
EasySIGN.
-
This topic was modified 4 years, 3 months ago by
-
This topic was modified 4 years, 3 months ago by
-
This topic was modified 4 years, 3 months ago by
-
This topic was modified 4 years, 3 months ago by
-
This topic was modified 4 years, 3 months ago by
-
This topic was modified 4 years, 3 months ago by
Paul Schoofs.
-
This topic was modified 4 years, 3 months ago by
-
This topic was modified 4 years, 3 months ago by
-
This topic was modified 4 years, 3 months ago by
-
This topic was modified 4 years, 3 months ago by
-
This topic was modified 4 years, 3 months ago by
-
This topic was modified 4 years, 3 months ago by
-
This topic was modified 4 years, 3 months ago by
-
This topic was modified 4 years, 3 months ago by
-
This topic was modified 4 years, 3 months ago by
-
This topic was modified 4 years, 3 months ago by
24 June 2022 at 10:08 #28062Marie-Laure GILLET
Participantbonjour
lorsque j’envoie mon lettrage sur le cut, la tache n’apparait pas dans le spouleur d’impression du Khona.
que dois je faire svp merci
-
This topic was modified 4 years, 3 months ago by
-
AuthorPosts
- You must be logged in to reply to this topic.