Yes, you are nearly ready to get the most out of your plotter! Control your plotter(s) directly from EasySIGN with maximum cutting quality by using the optimized plotter drivers. You will have full access to all cutting features regardless your plotter brand. One easy workflow will cover all your cutting devices!
Check the video here!
Add your plotter
File > Device Setup > 'Add plotter' Wizard…
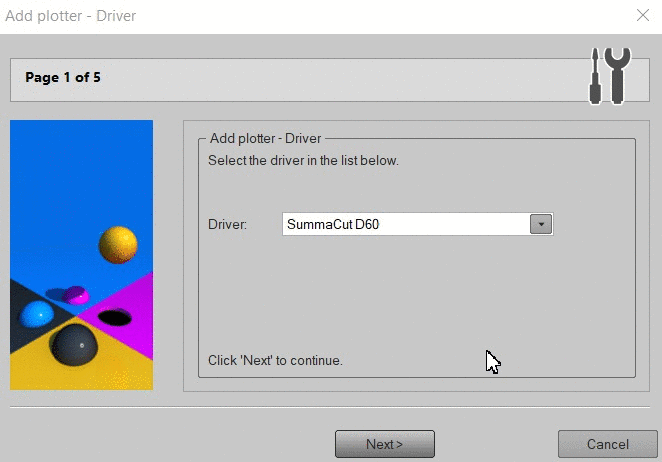
Before you start the installation wizard make sure you have installed the required USB driver and your plotter is available in Windows. Start the installation wizard and follow the steps.
1.) Select your plotter from the list and click “Next”.
TIP: If your plotter is not listed, try the universal HPGL or DMPL driver or do a feature request.
2.) Select the port to which your plotter is connected and click “Next”.
3.) Set the plotter communication details. Only needed in case of a COM port.
You can copy these settings from your plotter. After copying the settings click “Next”.
4.) Click on the “Finish” button to complete the installation.
Adjusting plotter settings
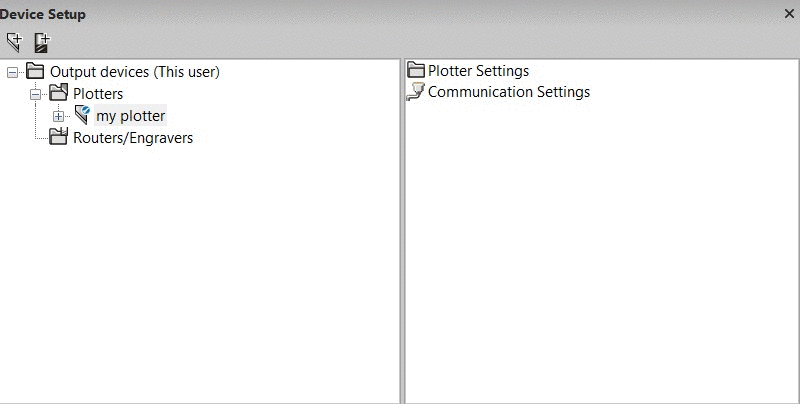
File > Device Setup > Open...
Open the folder named Plotters and select your plotter.
On the left side click on the "+" sign in front of the name of the plotter and select the folder Plotter settings. On the right side you see Add plotter settings, double clicking this icon will add a new plotter setting. Add as many different plotter settings as you need. So you can make a separate setting for every type of plotjob. For example add a setting for plotting vinyl and add a separate setting for cutting sandblasting media.
Double click on Plot settings 0 to open on the right side the various icons to control the plotter settings.
1.) Check the Sorting and optimization for setting the cutting order.
2.) Choose Plot options to open a dialog to change the settings to for example Start point behind the plot.
3.) Adjust Plotter settings like Knife offset and Knife pressure.
4.) Use the Device specific settings menu for adjusting more settings, depending on your plotter brand.
Each setting you change in the software will overrule the settings as given on the on the plotter.
Creating a plotfile
File > Plotting...
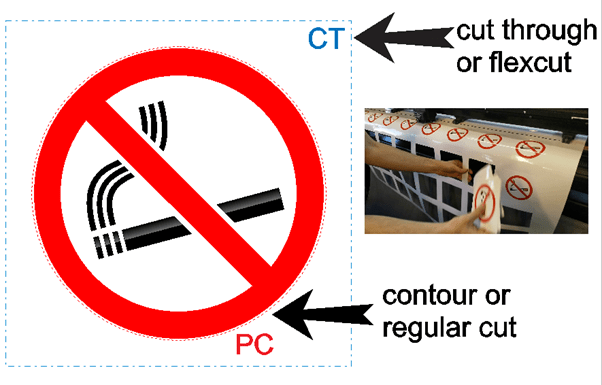
Open a worksheet, add text with the text tool, add a weedborder for fast peeling of the vinyl and press the plot button to cut the file.
This results in the following plot file:

You may also like

Color Management