Create and edit text with the EasySIGN text tool. Open the text tool in the toolbox as located left of your EasySIGN worksheet.

Text settings
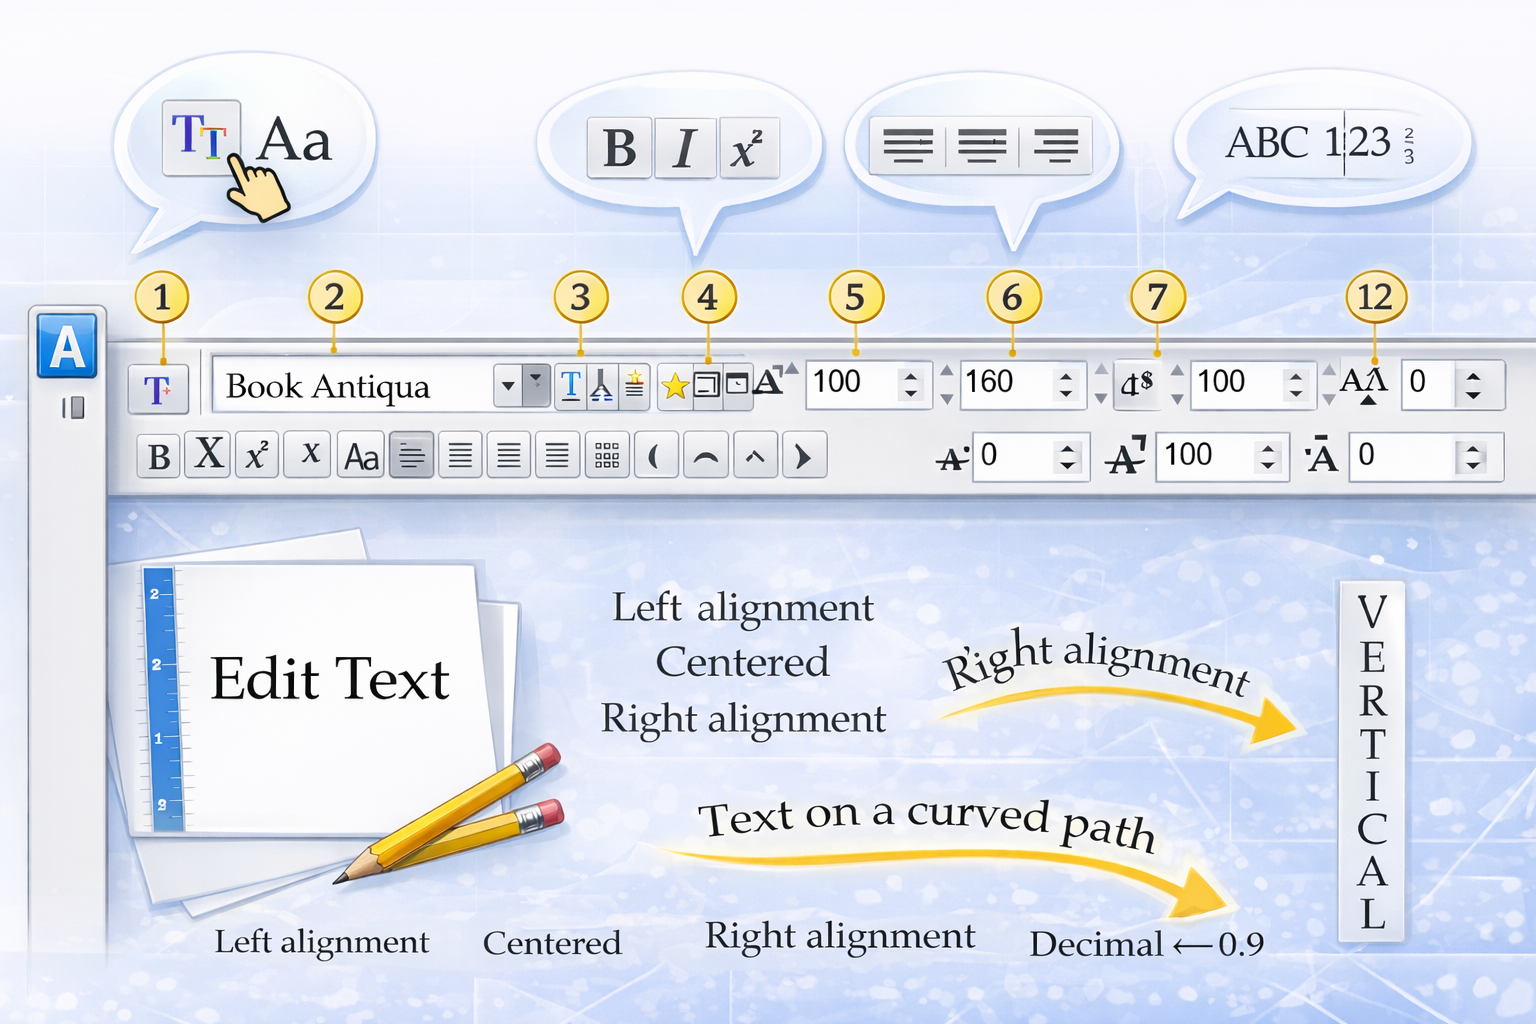
Now click with the left mouse button on the position where you want to place the text on your worksheet. Just start typing and create your settings in the Text mode bar.

Choose your font (1) or open the font manager (2) to preview the available fonts. Open your favorite font as listed (3). Set the character size (6), line distance (7), space width (8) and rotation of the characters (9). Add additional space between characters (10), set the width of the characters (11) and skew the text (12). Save the created settings as default (4) or apply the default settings on a text (5).
Text styling
![]()
![]()
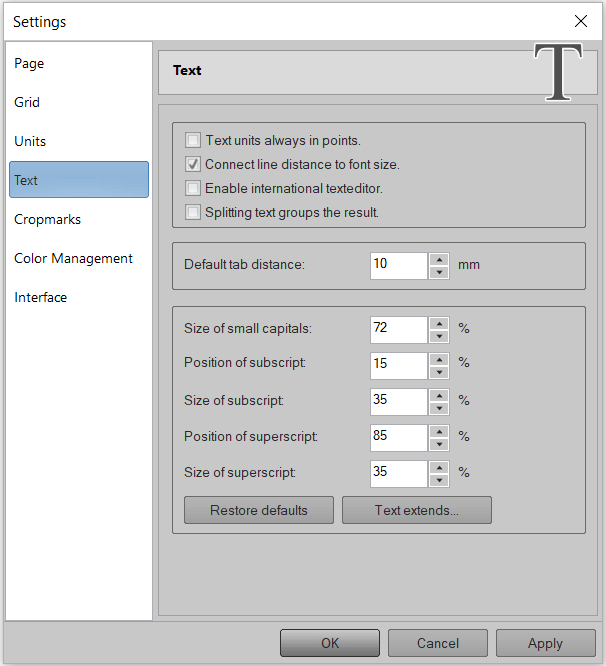
Set text to bold, italic, superscript, subscript, capitals or small capitals.
The general settings for the size of small capitals, superscript and subscript are available under View > Settings > Text
Text alignment
![]()
![]()
Set the alignment to left, middle or right. Justify the text on characters words or lines.

Text on path
Text > Place text on path
![]()
![]()
Place text on path, positioned on the left or right side, bottom or on top of a path.

Text tabs
View > Rulers
The postion of the Tabs can be set within the Rulers toolbar.
Text orientation
Set text from horizontal to vertical alignment Text > Text orientation > Hoteltext

Spelling checker
Avoid spelling mistakes and check your text with the Spelling checker Text > Spelling > Check spelling

You may also like

Color Management