An alignment cropmark is an assisting element of your design to easily position during application. This is particularly useful when you're aligning a logo with multiple vinyl colors or a poster that needs to be trimmed with an overlap.
EasySIGN has a cropmark system for any type of application and workflow, such as:
1. Multi-color vinyl plot jobs
2. Trimming a poster
3. Print and Cut jobs
4. Print and Cut jobs using barcodes
1. Multi-color vinyl plot jobs
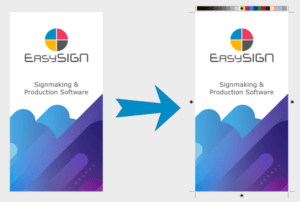
Many designs (such as road signs or window lettering) contain various vinyl colors. An example is the EasySIGN logo, this design contains 4 colors.
![]()
![]()
We need to produce this logo with 4 separate vinyl colors. To easily align this logo in the right position after cutting, we will add positioning cropmarks. For this design we place 4 cropmarks to be able to align it in position.
With cropmarks you can easily align various vinyl colors seamlessly when applying the plotted job. The cropmark system that suits this job is available from
Insert > Production > Insert cropmarks…
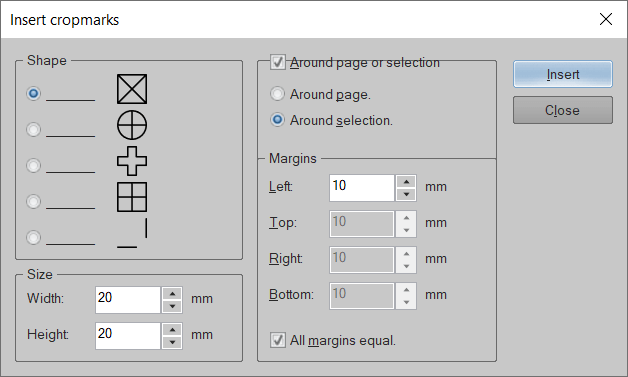
In the cropmark menu you can set the Shape, Size, Position and Margins of the cropmarks. In this case we choose for the square shape and place the cropmarks around the selected Sign. When you press Insert the alignment cropmarks will be added to your design.
![]()
![]()
The cropmarks will also be plotted for each color when you cut the job on your vinyl plotter. How to plot the file you can read in our Tips & Tricks Color separated workflows.
After plotting you can use the cropmarks for easy aligning of the various vinyl colors of your design. Just peel off part 2 of the cropmarks when peeling the yellow vinyl and peel off part 1 when peeling the magenta vinyl.

Afterwards you can use the cropmarks for aligning the magenta and yellow vinyl. When the cropmarks match during applying the vinyl, the design will be aligned exactly. You can repeat these steps for the black and cyan color to match all 4 colors of the logo.
2. Trimming a Poster
When you want to print a poster with a bleed that needs to be trimmed after printing, you can add the cropmarks and margins for trimming within EasySIGN.
The feature is available at Extra > Cropmarks > Add Cropmarks to selection…
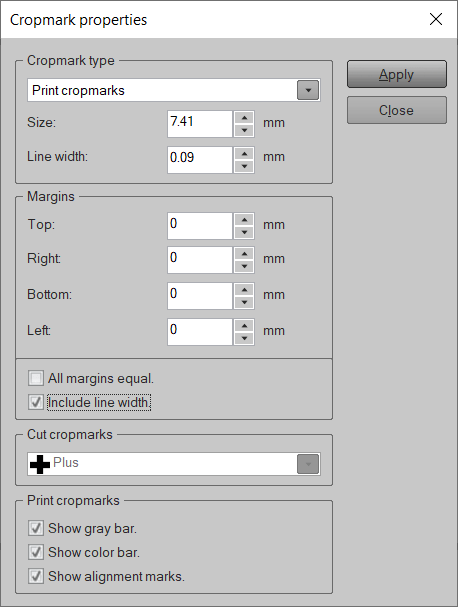
You can set the Cropmark type, Margins, Cut cropmarks and Print cropmarks. When you choose for a negative margin you can create create a bleed for cutting the poster. Besides the shape and margins you can add a grey and color bar to check all printed colors.
3. Print and Cut jobs
When creating stickers, you first print a file and contour cut the printed result afterwards with a cutting plotter. You need to add alignment cropmarks to recognize the position of the printed file on the media. Most plotters have an optical eye to recognize these alignment cropmarks. How does this work?
The cropmarks can be added within the cropmarks menu from View > Settings > Cropmarks
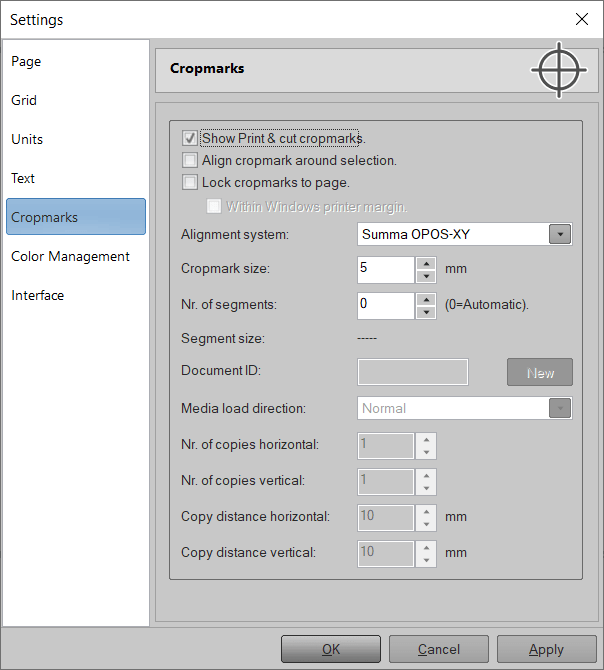
Within the cropmarks menu you can set the alignment system as required by your plotter. Under the Alignment system button you will find a selection of supported alignment cropmarks as supplied by the major plotter manufacturers, like Aristo, GCC, Graphtec, Ioline, Mutoh, Summa and Roland.
You can align the cropmarks around the selected file or connect them to the page. Set the size of the cropmarks and increase the number of segments to obtain more measure points and improve the accuracy.
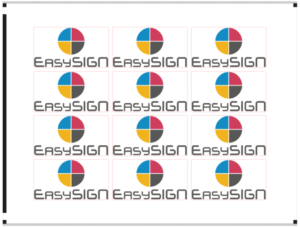
We created a design with a couple of EasySIGN stickers and choose for the cropmarks settings as given in the above menu, our worksheet including the alignment cropmarks is as follows:
Now you can print the file including the cropmarks on your printer. When the file is printed you can cut the file on your plotter. Just press the plot button within the EasySIGN standard toolbar or go to File > Plotting…
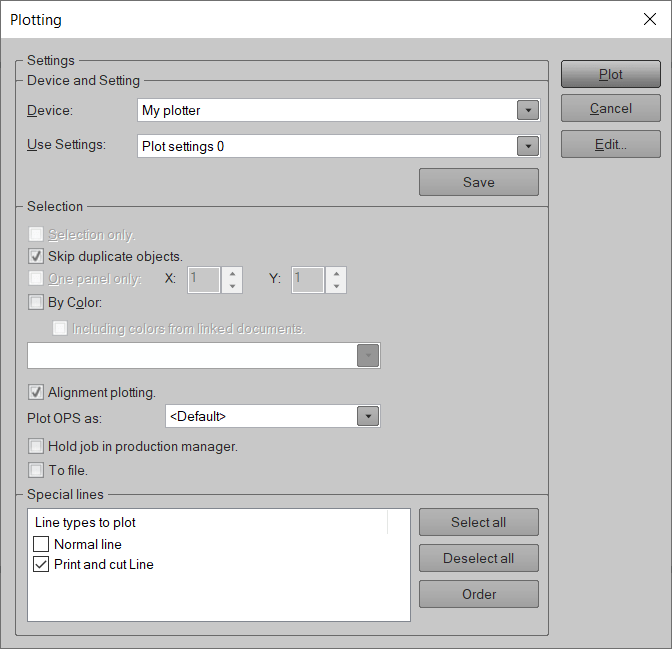
Make sure to check Alignment Plotting and in case you work with a “Print and Cut line” uncheck the Normal line within the plot menu to avoid cutting of all other vector lines in your design.
Press Plot to send the job to the plotter. The plotter will start searching the alignment cropmarks and when the position of the media is set the sticker contourline (set as “Print and Cut line”) will be cut.
3.1 Create a Print and Cut file for production on a flatbed table
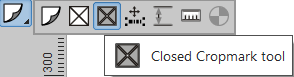
Besides an optical sensor there is a range of cutting plotters that use a camera for the recognition of the alignment cropmarks. These camera systems are often used on flatbed tables and do trace a certain shape with a fixed color and size, often a black circle of about 8 mm. The shapes are used for the recognition of the correct alignment of the design. The advantage of this system is that the cropmarks can be placed randomly around the design. When your plotter supports this system you can use the “Closed Cropmark” tool in EasySIGN to create these alignment cropmarks. The closed cropmarks can be set around a page or selection with
Insert > Production > Insert Closed Cropmarks…
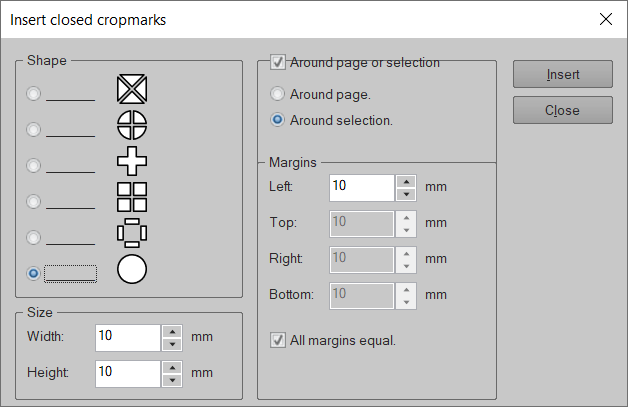
Or place the cropmarks manually on any position by using the “Closed Cropmark tool” as available within the EasySIGN toolbox which is standard placed on the left side of your EasySIGN worksheet.
The design including the closed cropmarks can be as follows:
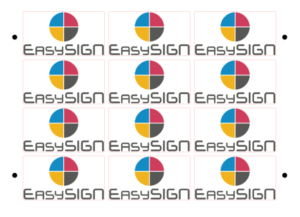
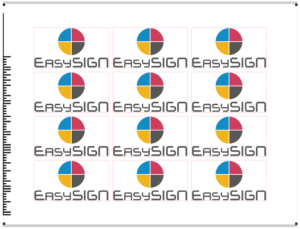
4. Print and Cut jobs using barcodes
Save time and improve the reliability of your production output by processing your print and cut jobs simultaneously. You can print the file together with an unique barcode to be recognized by the cutter software when you will cut the file. The barcode is used to retrieve the plot data after the file is printed. This barcode workflow is offered by a couple of plotter manufacturers. Choose your plotter's cropmark system as available within the cropmark systems menu in
View > Settings > Cropmarks
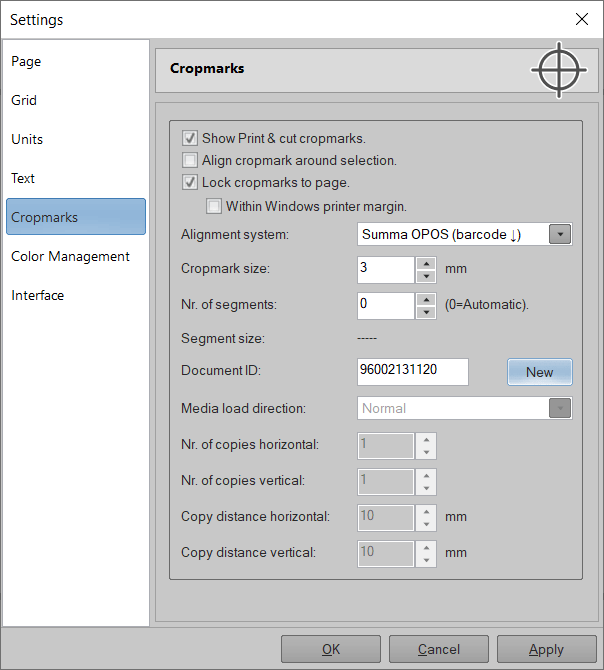
In case needed press the New button to refresh the unique document ID. Press Apply to activate the barcode alignment cropmark system around your design on your EasySIGN worksheet. Now the alignment cropmark contains a unique barcode that can be read by the plotter. In order to cut the file you need to send the barcoded document to the plotter software. Read more about setting up your plotter.
You may also like
Color Management