There are many good reasons to make a duplication of your EasySIGN worksheet. Making a duplicate can be done for improving your production reliability by separating your jobs by production output. Or duplicate your EasySIGN worksheet to customize your design for each panel (or application) without changing your original design.
There are also various ways to duplicate an EasySIGN worksheet. You could just save it as another file, copy all objects and paste them in another worksheet, or use the brand new duplicate worksheet feature File > Worksheet > Duplicate...
By using the duplicate feature, worksheets will be connected to the original design worksheet. So all worksheets will stay together. Therefore this feature is very useful for creating custom exhibition panels or dividing your worksheets in separate print- and cut- jobs. Checkout the following examples to see how this can be done.
Create exhibition panels
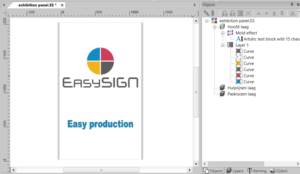
We have created a design for an exhibition panel. There will be 4 variations of this panel. The first panel is depicted in the screen dump below.
Besides the panel above there are 3 other panels required with a variation on the panel text. The size, positioning and shape of all other objects will not change. You can create the 3 worksheets for the remaining panels and connect these automatically to the original design worksheet. Just choose the feature “Duplicate” within the menu.
File > Worksheet > Duplicate...
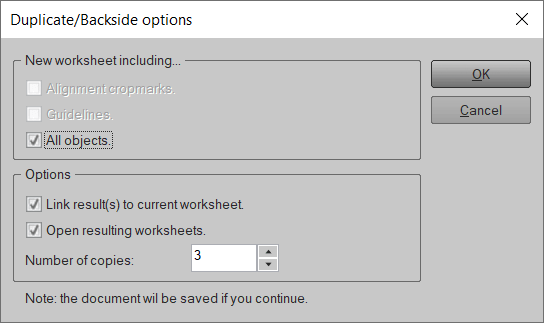
All selected objects will be transferred to the newly created copies of the worksheet. Besides the objects you can optionally add guidelines and positioning cropmarks to the new duplicates of your worksheet. In this design we don’t require guidelines nor cropmarks, so only the option “All objects” is selected.
The number is set to 3 as we need 4 panels for our stand (the original worksheet plus the 3 duplicates). When you press the “OK” button you will see a message that you need to save the worksheet. The 3 copy’s will be added, linked to your saved worksheet and be opened automatically. So now you have 4 worksheets opened (the original and the 3 copies).
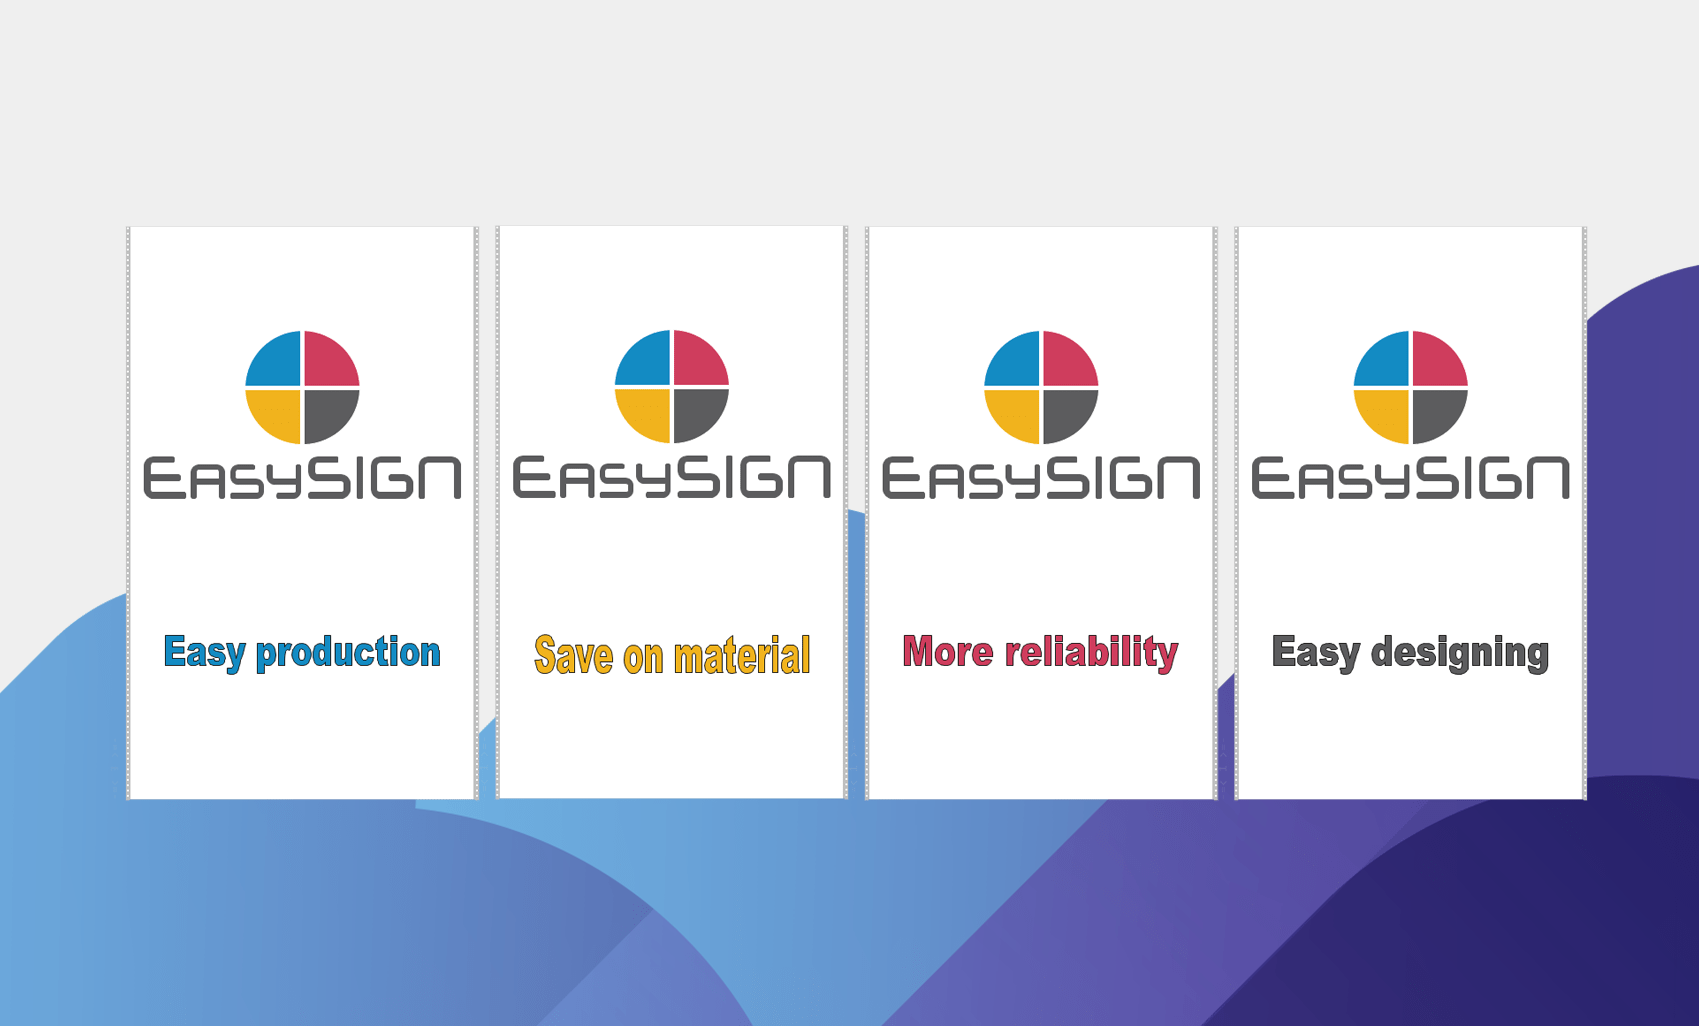
You can easily change the text to customize each exhibition panel. This results into the following panels all connected to the original designed worksheet.
The end result is 4 customized panels:


Create separate worksheets for printing and cutting
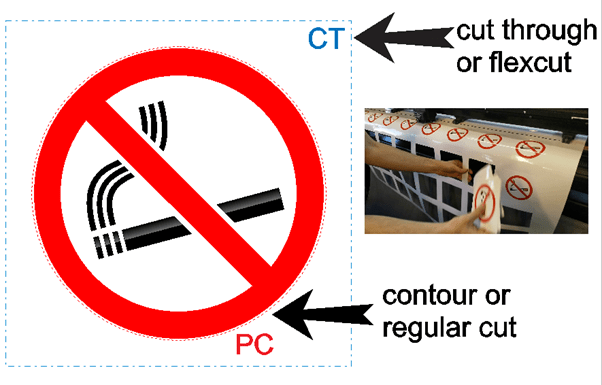
You can use the duplicate worksheet feature to create production worksheets. As example we will create the production of a set of stickers which need to be printed, laminated and cutted. We designed a worksheet ready to be send to the printer and we will make a duplicate that contains the plotting data to be used for cutting after the printed file is laminated. By separating the production file into a print and a cut document, we avoid output errors in the production. We have created a set of stickers.
![]()
![]()
The design contains a sticker with a print & cut contour outline. The goal is to print the stickers, laminate the printed file and cut the stickers on your plotter after lamination. In order to cut the sticker contour lines on the correct position the use of an alignment cropmark system is required. The alignment cropmarks will also be printed and are used for the alignment plotting on the cutter. This design we will output as worksheet for printing and a create a duplicate to output the printed design for the alignment plotting.
In order to create the output data for the plotting all print and cut lines need to be selected in the design. The fastest way to select these lines is to use the select by feature Edit > Select by > Object...
The "Select by" menu opens:
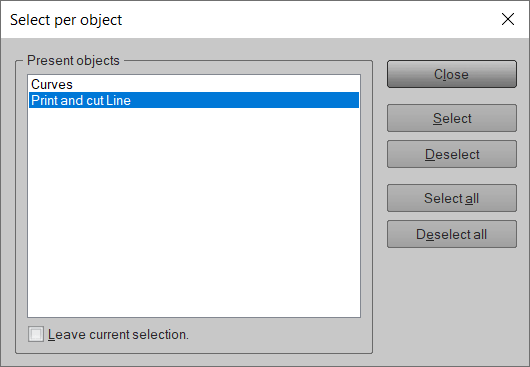
Choose the option “Print and Cut Line” and press select. To leave this menu just press close.
The next step is to duplicate the worksheet File > Worksheet > Duplicate…
The Duplicate menu will open:
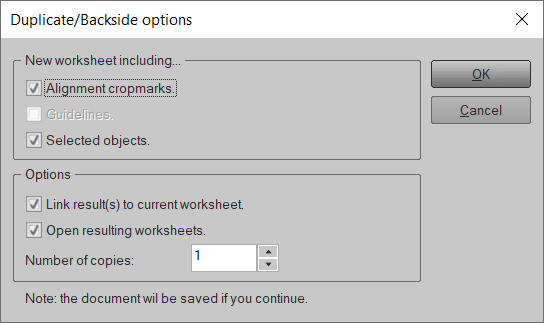
Choose "alignment cropmarks" and "selected objects" and press “OK” to create the duplicate worksheet.
Now we have created a duplicate worksheet containing the cutlines and the alignment cropmarks for cutting the stickers. No colors or other objects are available in order to avoid errors in the production output.
And you can use the design worksheet for printing the file including the alignment cropmarks.
![]()
![]()
![]()
Dividing your worksheets in production worksheets avoids production errors and saves on material waste and production time.
You may also like

Color Management