Reducing material waste is one of the best options to save on material, time, and money. EasySIGN offers handy nesting tools to use your material as efficiently as possible.You can use Block Nesting and True Shape Nesting for optimization of your media usage.
What is Nesting?
Nesting is the process of placing your design as efficiently as possible to save on production materials.
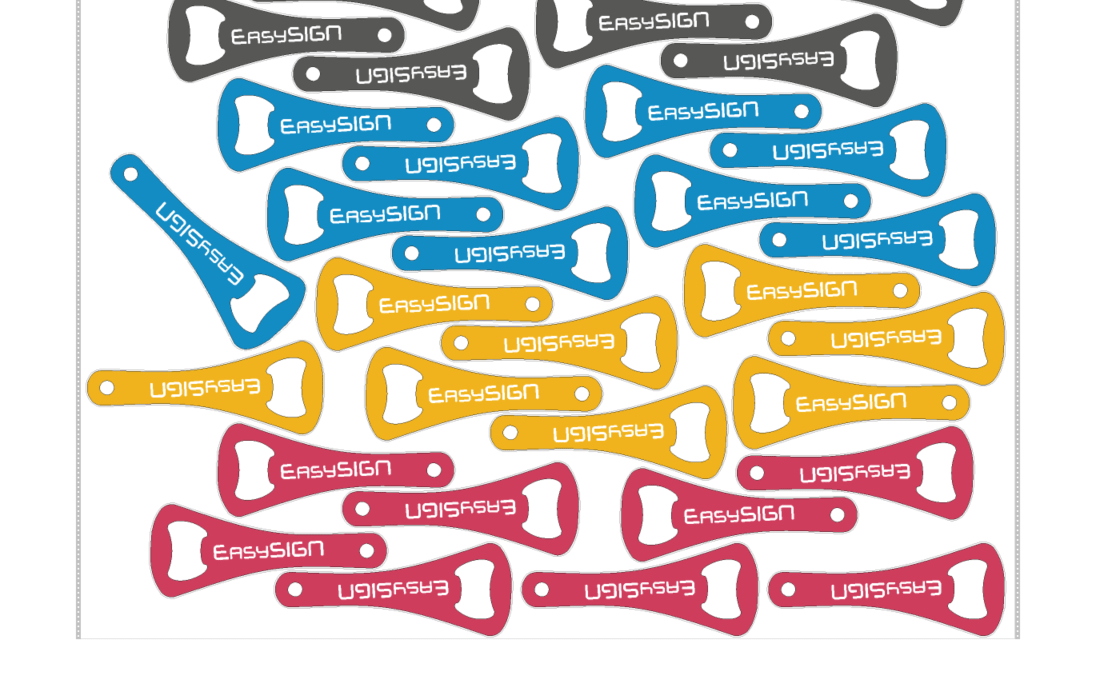
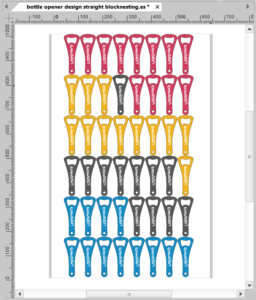
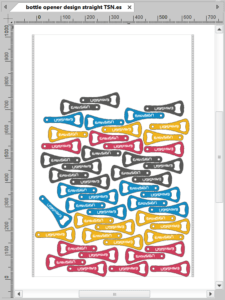
How this works in EasySIGN is best explained with an example of a production file with many objects which needs to be produced. The following worksheet contains a collection of bottle openers that need to be printed and cutted.
We want to produce this file on a sheet of 1000 x 650 mm. The page format of the above worksheet is set to production sheet size. You can see that the design is larger than the page size. To be able to produce this file all bottle openers need to be placed on the sheet page to avoid that some bottle openers will be produced partly.
You can place the bottle openers manually to fit within the worksheet size or you can use the EasySIGN Nesting tools for optimization of the position of the objects.
1. Block nesting
Effects > Block nesting
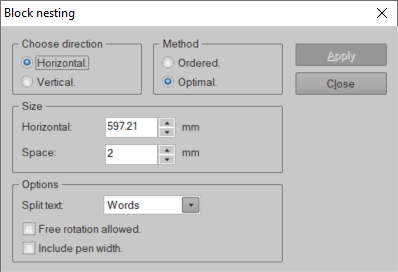
Within the Block Nesting menu you can set the orientation of the objects. Choose for Horizontal or Vertical laying out of the objects. Size defines the available space in this direction and Space the space between objects.
You can set the method for the lay out: choose for Ordered to keep similar objects together or choose for Optimal if objects can be placed randomly for additional space saving.
Optionally you can choose to split text into words or characters. This option can only be used when the position of the separate characters in your design is not fixed.
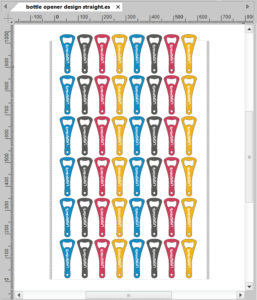
Press Apply to activate the Block Nesting.
By using the Block Nesting tool you can easily fit the design on the page format for producing the job! After applying the Block Nesting you can manually adjust the Block Nesting by selecting the drag tool as available within the EasySIGN toolbox on the left side of your EasySIGN worksheet.
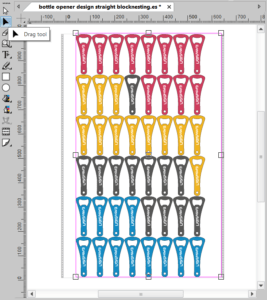
You can change the position of the Block Nesting by moving the magenta line of the Block Nesting effect.
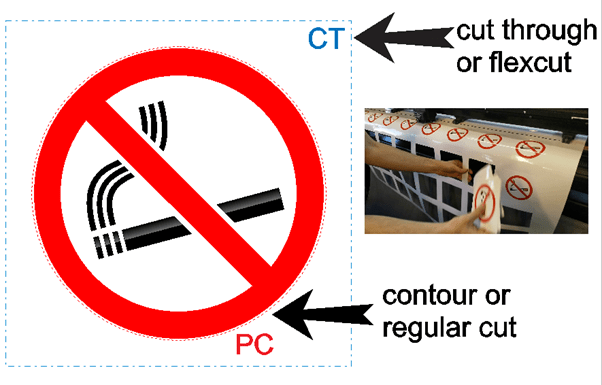
2. True Shape Nesting
Another nesting tool is True Shape Nesting. The difference between Block Nesting and True Shape Nesting is that with True Shape Nesting the objects can be rotated separately to obtain a further saving on material waste and the nesting is based on cut lines instead of the shape's contour lines. To see the difference with Block Nesting we will start with the original design to show the steps for setting the True Shape Nesting.
2.1 Prepare for True Shape Nesting
Effects > True shape nesting > Prepare
The first step is to prepare the design for True Shape Nesting. Preparing for True Shape Nesting is required as you need to specify the various settings and line type which will be applied during the nesting.
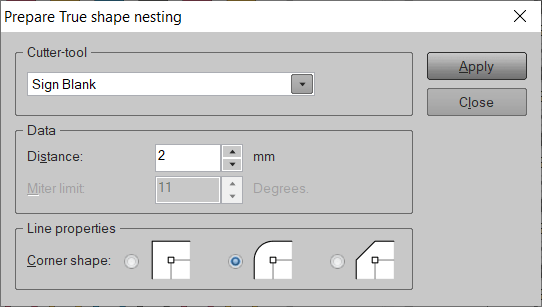
If you don't want to define cut lines at this point, you can use the Sign Blanc as a neutral line type. Besides the line style, you can set the space around the various objects when nesting and you can choose straight or rounded corners of the lines with which the nesting is calculated. After entering the nesting settings press Apply to activate the nesting preparation.
When you zoom in on the worksheet you now can see the newly created sign blanc lines around each objects. This line will be used to calculate the True Shape Nesting when Applying the True Shape Nesting.
Apply True Shape Nesting
Effects > True shape nesting > Apply
The next step is apply the True Shape Nesting.
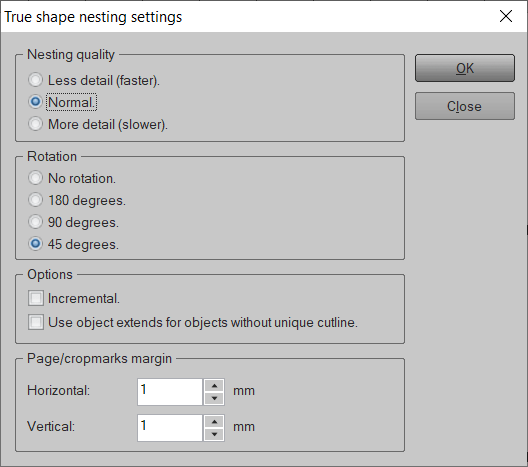
In this menu you can set the Nesting quality and Rotation. More detail and a lower rotation angle will be slower as the calculation time will be longer, but it can result in more media saving. Just give it a try to find what's best in your situation.
Choose for the option Incremental in case you want to add some objects to a document that already contains a True Shape Nesting. In that case the new nested files will be added to the existing nesting, while retaining the previous nesting result. You can choose for the option Use object extends for objects without unique cutline in case your design contains objects that are not prepared in advance for the True Shape Nesting.
The amount of material you can save depends on your design and the options you choose, but in general you can easily save 40% compared with the original design!
Comparing methods
The first picture is the original design, the second picture with Block Nesting applied and the last one is with the True Shape Nesting result. With the nesting tools you can easily fit your design on output format and reduce your media waste!
You may also like

Color Management