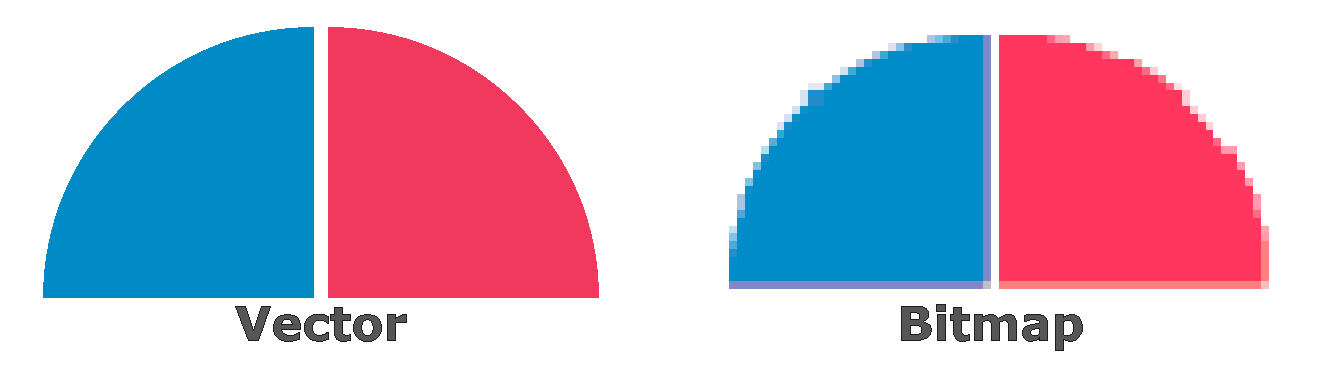
When you enlarge a vector image, there is no loss of quality. When you enlarge a bitmap image, it will become grainier because the resolution of the image becomes lower, so the pixels become visible.
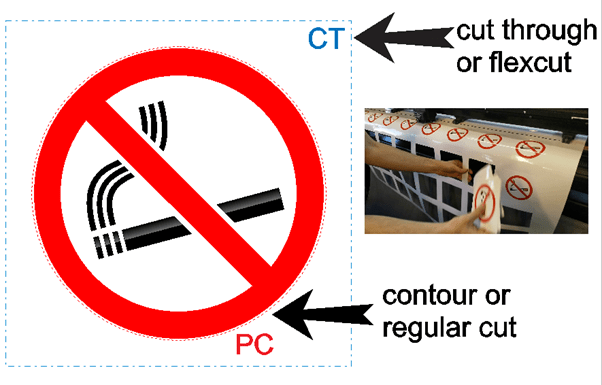
Vectorlines are required to cut the image on a plotter or contour cut a printed file on a flatbed table. With EasySIGN, you can easily create the vectorlines as needed for the production of the cutjobs.
Magic wand tool
Bitmap > Magic wand
Use the Magic wand tool for example to select one colour in a bitmap and convert this color into a cutting line.
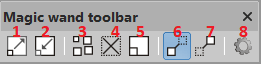
1 Expand selection: expand the selection size. Each click will add1 pixel tot he size of the selection.
2 Retract selection: shrink the selection to avoid white space. Each click shrinks the selection with a size of a pixel.
3 Select all similar areas: all areas with the same color will be selected.
4 Deselect all: no colors will be selected.
5 Invert selection: handy tool in case the background is one colour and the object contains many colors. In that case just select the background and invert this to create a selection of the colored object.
6 Show selection: displayes all colors of the bitmap and shows the selected areas.
7 Show end result: displayes the result of the selected areas.
8 Settings, this will open the menu to alter the settings:
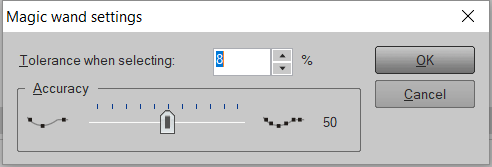
Increase the tolerance to select a wider range of colors or decrease the tolerance to select a smaller range of colors. Increase the accuracy to add more nodes or decrease the accuracy for less nodes in the end result.
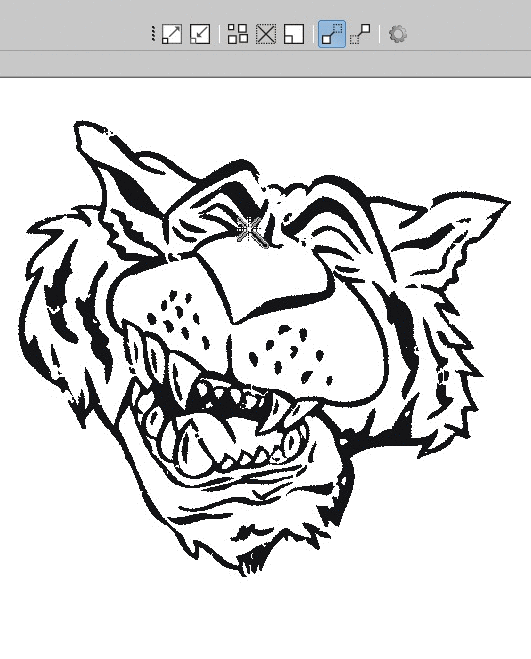
As example we make a vectorization by selecting all black colorspace in the bitmap picture and convert this into curves to cut the file on a plotter.
Vectorization
The vectorization tool is suited for bitmaps of a reasonable pixel quality and limited number of colors. Select a bitmap and open Bitmap > Vectorization
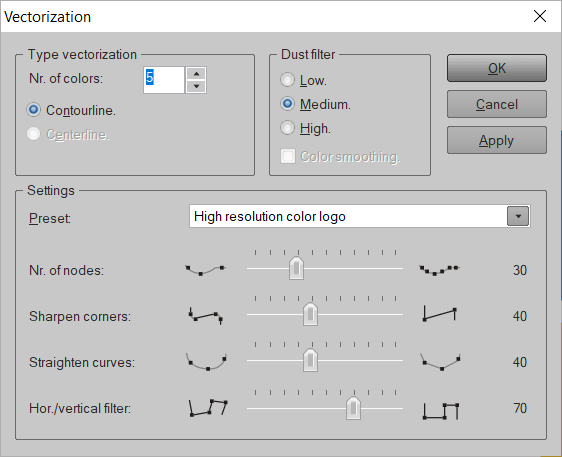
Set the number of colors and choose the applicable Preset. An optimized setting is available for low and high resolution drawings, logo's, text and photo's. For all presets is a setting for black and white as well as full color bitmaps present. In case none of the presets suits you can create your own settings by selecting the User defined preset and use the sliders to adjust the Number of nodes, Sharpen corners, Straighten curves and Horizontal/vertical filter.

Vectorization 2
The vectorization 2 tool is more suited for lower resolution bitmaps such as often used on webpages.
Select a bitmap in your EasySIGN worksheet and open Bitmap > Vectorization 2...
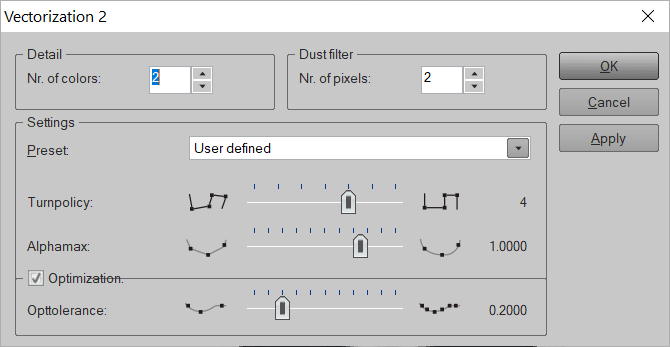
Set the Number of colours and the Number of pixels more pixels will give a less detailed result. Use the applicable Preset. Presets are available for both high and low resolution files and are divided by file kind such as color, black and white, drawing and photo. Choose for User defined to use your customized settings. Sharpen the edges with the Turnpolicy and alter the smoothness of the squares with the Alphamax. Add more or less node with the Opttolerance slider.

You may also like
Color Management