Layers are applied in a worksheet to keep easily an overview of the various elements that make up your production design. When you have a more complex worksheet, you can faster select the various objects by placing them on separate layers.
As a result, the design remains more adaptable as you can quickly change the individual parts of your worksheet.
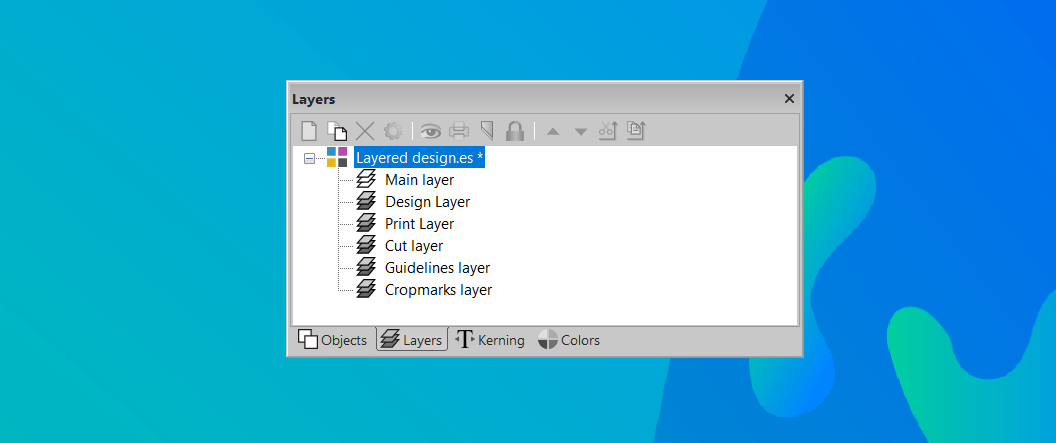
Default layers in EasySIGN
Layers are visible in the Layers menu, which is placed by default on the right side of your worksheet. You can also open the Layer toolbar from the menu
View > Toolbars > Layers
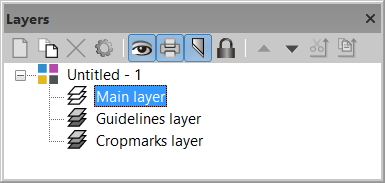
An EasySIGN worksheet contains standardly 3 layers:
1. Main layer: Most objects will be placed by default on the Main layer.
2. Guidelines layer: On this layer the Guidelines are placed.
3. Cropmarks layer: Alignment cropmarks are placed on this layer. Want to know more about alignment read our tip & trick Alignment Cropmarks
In case you want to change the default layer order of your EasySIGN worksheets you can do this in the menu File > Settings... > General
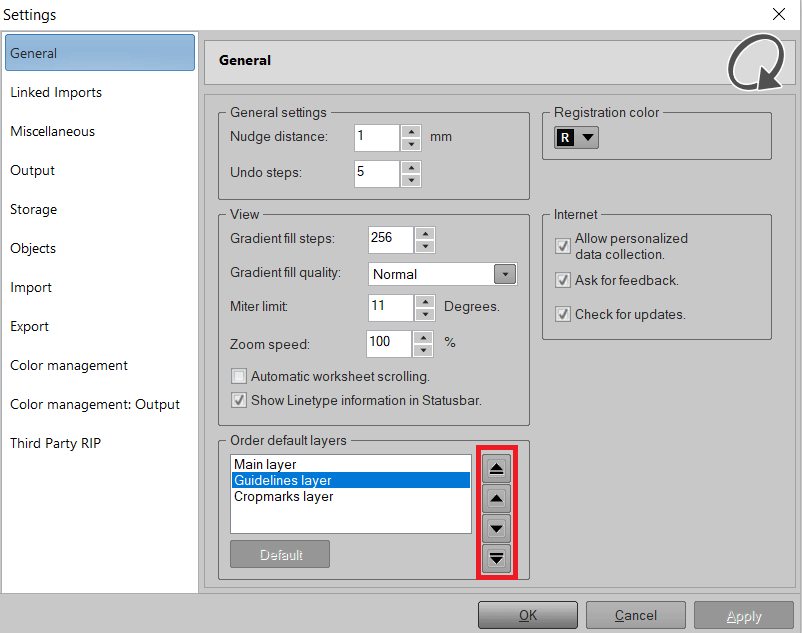
You can change the order of the layers with the move buttons and press Apply to activate the new default order of the layers. When you want to go back to the factory defaults of the layer order you can press the button Default.
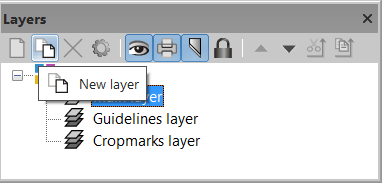
Add a Layer
Adding a New layer can be done with the New layer button in the Layer toolbar.
You can set the following options for each layer:
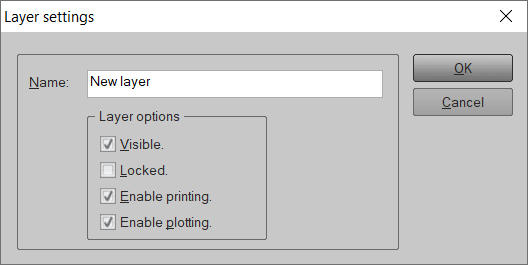
Visible: The layer will be displayed in the worksheet.
Locked: In case this option is ticked then the layer is locked and the objects on this layer can not be altered.
Enable printing: The layer can be printed when the option is enabled.
Enable plotting: The layer can be plotted when the option is enabled.
Moving Layers and objects
The stack order of layers can be changed with the move layer buttons. You can move a layer up or down.
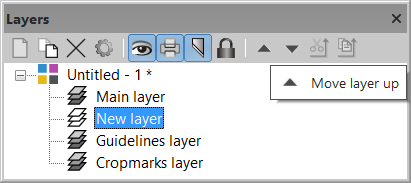
Object placed on the upper layer are placed on top of the design. The lower the ranking of the layer the lower the objects are placed in the design.
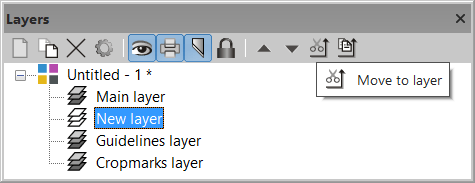
You can also move objects from one layer to another or copy an object from one layer to another layer. Just select the object you want to move to another layer, select the layer where you want to move or copy the object to and press the button Move to layer or Copy to layer to copy the object to this layer.
By working with layers you keep an ordered overview of the various parts of your worksheet, you can make adjustments faster and have less chance on production errors by using separate output layers.
You may also like

Color Management